Building Knowledge
Cold-weather gypsum product best practices
Learn installation protocols to keep projects on schedule when the temperature drops

Winter weather introduces real jobsite challenges to commercial worksites, from slower joint compound drying and reduced adhesive performance to roof assemblies exposed to frost or trapped moisture. When ambient temperatures plunge and relative humidity climbs, standard gypsum installation routines can lead to delayed project schedules.
Before work begins, contractors should confirm product-specific temperature requirements, condition the space and protect materials from freezing and precipitation.
To protect the integrity of the building envelope and interior partitions, project teams must create installation schedules that match manufacturer-tested standards. This article provides cold-weather installation protocols for ProForm® drywall finishing products, Gold Bond® drywall products and DEXcell® roof boards.
Finishing products: the 50°F continuous rule and drying physics
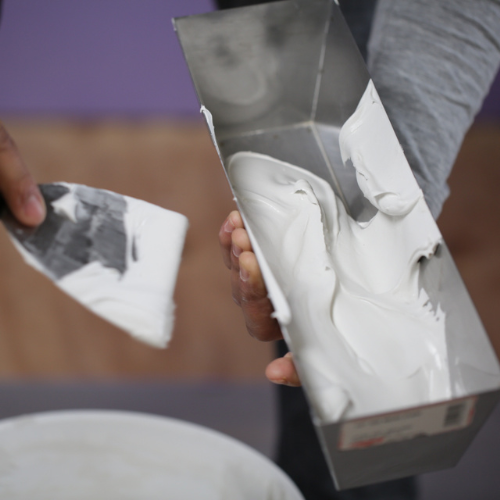
Drywall finishing products face the most restrictive environmental tolerances on a cold worksite. Finishing compounds rely either on evaporation (ready-mix formulas) or chemical crystallization (setting compounds), both of which are severely impaired by cold conditions.
Industry standards (ASTM C840 and GA-216) require an ambient and surface temperature of not less than 50°F to be maintained:
- For at least 48 hours prior to compound application
- Continuously throughout the application process
- Continuously until all applied materials are thoroughly dry
Finishing teams cannot turn heaters on for their shift and turn them off when leaving the worksite at night. Temperature swings can cause joint failure, delayed set times and paper bond destruction.
Understanding temperature vs. drying time
Ready-mix joint compounds lose moisture to the surrounding air and the porous face paper of the board. As temperatures drop and relative humidity (RH) rises, drying cycles expand exponentially.
- At 70°F and 40% RH, standard ready mix dries in approximately 14 hours.
- At 50°F and 70% RH, that same coat takes roughly 2.25 days (54 hours).
- At 50°F and 90% RH, drying stretches to approximately 6 days.
For further guidance, review the ProForm products drying time vs. relative humidity reference chart:
Relative Humidity | Temperature | ||||
|---|---|---|---|---|---|
| 50°F | 60°F | 70°F | 80°F | 100°F | |
| 0% | 19 Hours | 13 Hours | 9 Hours | 6 Hours | 3 Hours |
| 20% | 23 Hours | 16 Hours | 11 Hours | 8 Hours | 4 Hours |
| 40% | 29 Hours | 20 Hours | 14 Hours | 10 Hours | 5 Hours |
| 50% | 36 Hours | 24 Hours | 17 Hours | 12 Hours | 6 Hours |
| 60% | 42 Hours | 29 Hours | 20 Hours | 13.5 Hours | 8 Hours |
| 70% | 2.25 Days | 38 Hours | 26 Hours | 19.5 Hours | 10 Hours |
| 80% | 3.25 Days | 2.25 Days | 38 Hours | 27 Hours | 14 Hours |
| 90% | 6 Days | 4.5 Days | 3 Days | 49 Hours | 26 Hours |
| 98% | 26 Days | 18 Days | 12 Days | 9 Days | 5 Days |
Applying successive coats over damp or cold underlying layers can invite severe finish defects:
- Tape Photographing: Heavy mud layers under the tape remain wet, resulting in delamination or visible tape outlines after paint application.
- Delayed Shrinkage: As moisture slowly escapes over weeks, compounds shrink unevenly, leaving tape lines, depressions and starved joints.
- Joint White Banding: Applying water-based ceiling or wall textures over cold, slow-drying joints draws water-soluble paper additives to the surface, creating visible white striping and sheen disparities across treated seams.
Ready mix storage, freezing and thaw protocols
- Storage: Maintain product containers at or above 50°F. Do not allow ready-mix cartons or pails to sit directly on frozen concrete slabs; store off the floor and away from uninsulated exterior walls.
- Frozen Ready Mix Rescue Procedure: If ready-mix compound freezes, allow it to thaw at room temperature for at least 24 hours. Once thawed, turn the container upside-down for a minimum of 15 minutes. Invert it right-side up, open the lid, and remix with an electric drill. If the compound cannot be remixed to a smooth, lump-free consistency within one minute, discard the container immediately.
Setting compounds: chemical advantages and cold-water cautions
For multi-coat operations on compressed winter timelines, chemically hardening products like ProForm® Quick Set Lite™ or ProForm® FasTrack® provide a critical production advantage. They harden via a chemical reaction to water rather than evaporation, permitting recoating as soon as the material sets.
Setting compound precautions:
- Mixing Water Temperature: Never mix setting compounds with freezing or ice-cold worksite water. Cold water slows the chemical reaction, dramatically extending set times. Always use clean, drinkable, room-temperature water.
- Never Retemper: Adding water once setting has begun compromises mechanical strength and causes joint cracking.
Check installation requirements before work begins.
Access AI-powered, expert-backed answers about products, assemblies and technical resources provided by National Gypsum.
Ask NGi
Gypsum board installation and space conditioning
Gypsum panel installation also requires strict temperature and humidity management, particularly regarding mechanical fastening, adhesive bonding and veneer plaster assemblies.
Temperature thresholds for boards
- Mechanical fastening: Maintain an ambient space temperature of not less than 40°F during the application of gypsum board panels, including standard Gold Bond® Gypsum Board, High Strength LITE®, XP® and eXP® panels.
- Adhesive attachment and lamination: When using drywall adhesives (complying with ASTM C557) or compound-laminating panels in double-layer systems, the threshold increases to 50°F. This temperature must be established 48 hours before board hanging and maintained continuously until adhesives and compounds fully cure.
The threat of unvented space heaters
During winter fit-outs, when permanent HVAC systems are not yet operational, commercial worksites often rely on temporary fuel-fired heaters commonly known as salamanders. While these heaters provide needed warmth, operating them without proper ventilation can create significant risks.
Burning propane or kerosene releases roughly one gallon of water vapor for every gallon of fuel consumed. In an enclosed structure, this moisture condenses directly on exterior sheathing (such as Gold Bond® eXP® Sheathing) and cold interior face paper and should be avoided.
Nail pops: a hidden consequence of winter moisture cycles
Cold-weather jobsites can create conditions that increase the likelihood of nail pops. Excess moisture from unvented temporary heaters, wet framing lumber and inadequate ventilation can cause framing members to swell. As the structure dries during the heating season, lumber shrinkage and movement may cause fasteners to loosen and become visible through the finished surface. Preventing nail pops starts with controlling moisture before finishes are applied.
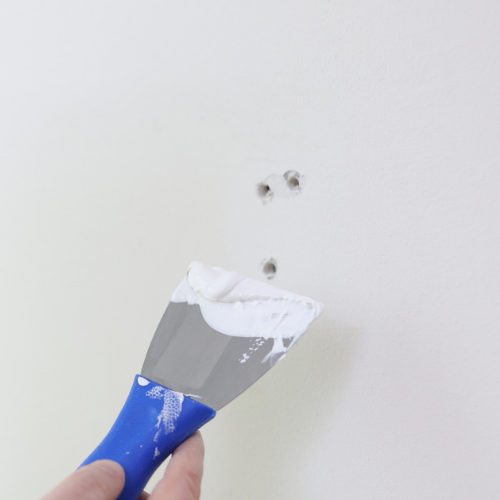
To help reduce nail pops:
- Provide adequate heat and ventilation to dry framing lumber before finishing.
- Align framing members before panel installation.
- Nail the center of the gypsum board first.
- Hold the board firmly against framing members during fastening.
- Use proper fasteners and verify fastener placement before nail spotting.
- Consider systems designed to reduce nail pops, including double-layer lamination, double nailing systems, floating angle systems, adhesive nail-on systems and screw application methods.
If nail pops occur:
- Repair nail pops immediately, if they appear before decoration.
- If they occur after decoration, wait until the framing lumber has dried, typically after one heating cycle, before making repairs. Repair by driving a GWB-54 nail approximately 1-1/2 inches from each side of the popped nail while holding the board firmly against the framing member. Countersink the popped nail, remove loose compound and refinish the area with joint or topping compound.
Low-temperature commercial roofing protocols for gypsum roof boards
Commercial roofing assemblies installed in winter demand strict adherence to weather-tightness rules to prevent trapping moisture beneath membranes.

Whether installing DEXcell® Glass Mat Roof Board, DEXcell FA®, DEXcell FA VSH®, or DEXcell® Cement Roof Board, contractors must install only as many coverboards as can be completely sealed beneath the finished watertight roof covering during the same work shift.
Never expose open roof boards to overnight frost, freezing fog or snowfall. Applying membranes over frost- or dew-covered coverboards traps moisture inside the roofing system, leading to:
- Inter-ply blistering under spring/summer thermal cycling
- Adhesive debonding
- Substantial decreases in wind-uplift resistance and Factory Mutual (FM) rating performance
DEXcell Roof Board storage and handling
- Avoid water exposure during shipping, handling, storage, installation and after installation of roof boards in order to avoid the formation of mold or mildew.
- Remove nonbreathable shipping wrap material upon receiving and storing roof boards.
- Store roof boards flat, off the ground and under cover. Use sufficient supports extending under the entire length of roof boards to prevent sagging.
- Do not install roof boards with visible signs of moisture damage or mold growth.
- Do not apply roof boards over other building materials where conditions exist that are favorable to mold growth.
Keep winter worksites on schedule
Cold weather conditions do not require shutting down interior drywall finishing or commercial roofing operations — provided project teams follow established engineering guidelines. By maintaining continuous 50°F conditions for finishing, using indirect-fired heat sources, and sealing roof assemblies daily, contractors avoid expensive callbacks while delivering warrantable installations.
Need assembly guidance?
Reach out to our team of technical experts at 1-800-NATIONAL® Construction Services for on-the-spot installation guidance.
Connect TodayBe the first to hear of new NGConnects Blog posts by subscribing here for early access.